
Export a collection into a game project
Your level needs a few textures, some sound effects and a model, each from a
different pack. In this tutorial you collect them, export them into your game
project in one go, and look at the manifest.json and CREDITS.md the export
writes next to them, so you can credit every pack correctly.
You need: a library with a few packs in it (see Organize a new asset pack), and a folder in your game project to export to. The screenshots use three packs: “Stone and Wood Textures”, “Retro Sound Effects” and “Low Poly Props”, all added with their license.
Time: about five minutes.
1. Start a collection with textures
Section titled “1. Start a collection with textures”Click Stone and Wood Textures under Folders in the sidebar. Click
mossy_ground.png, then Cmd/Ctrl-click stone_wall.png and
stone_wall_normal.png. In the selection bar at the bottom of the grid,
click Collection ▾ and choose New collection….
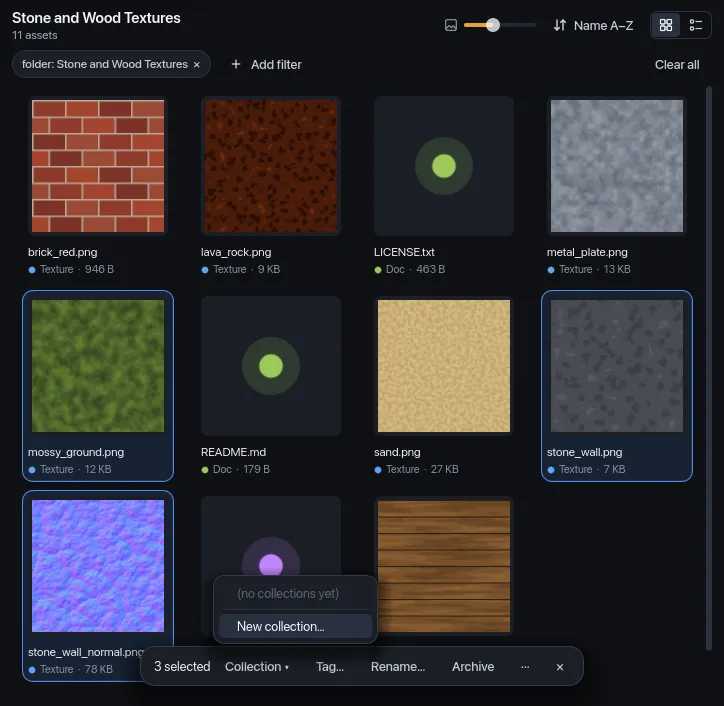
Name the collection Crypt level and click Create. The three textures
are in it.
2. Add the sounds
Section titled “2. Add the sounds”Click Retro Sound Effects under Folders. Click coin_pickup.wav,
then Shift-click hit_hurt.wav to select the first three. Click
Collection ▾ again: your new collection is listed. Choose Crypt
level.
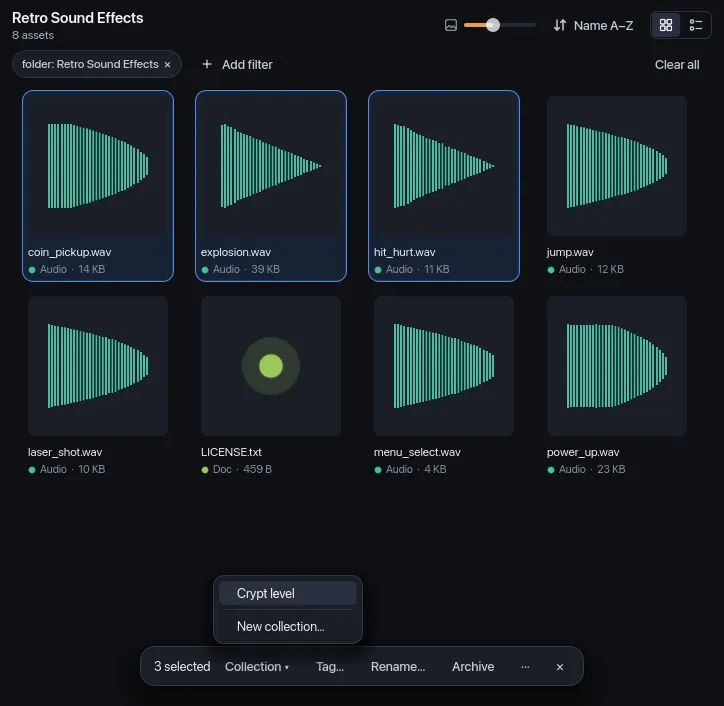
The status bar confirms “Added 3 assets to Crypt level”.
3. Add a model
Section titled “3. Add a model”For a single asset you don’t need the selection bar. Click Low Poly Props
under Folders, right-click torch.glb and choose Add to collection →
Crypt level.
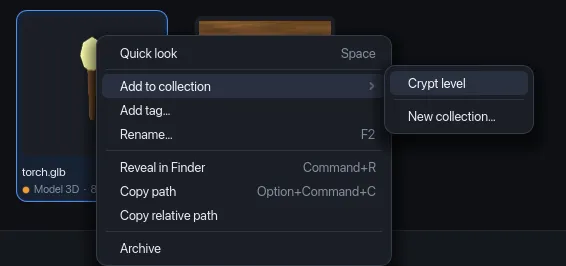
Right-clicking an asset that’s part of a multi-selection acts on the whole selection; right-clicking any other asset acts on that asset only.
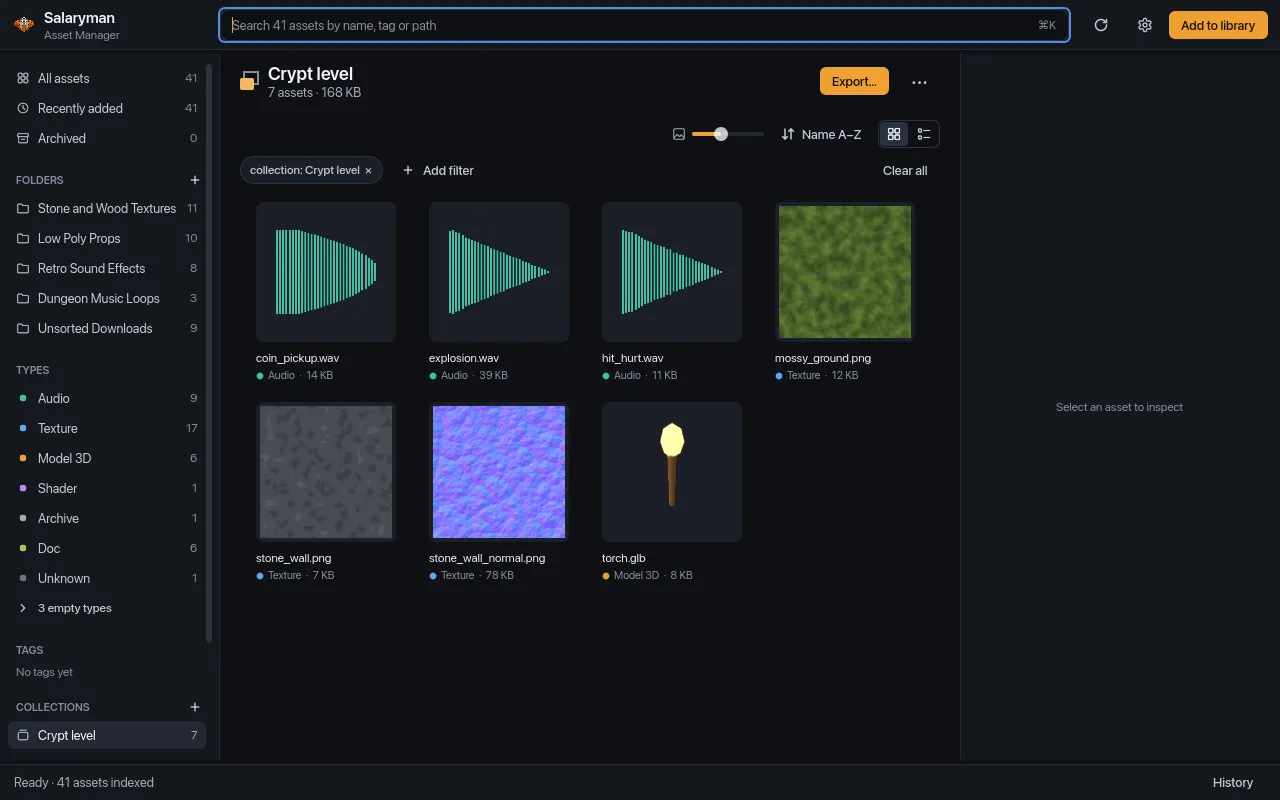
4. Check the collection
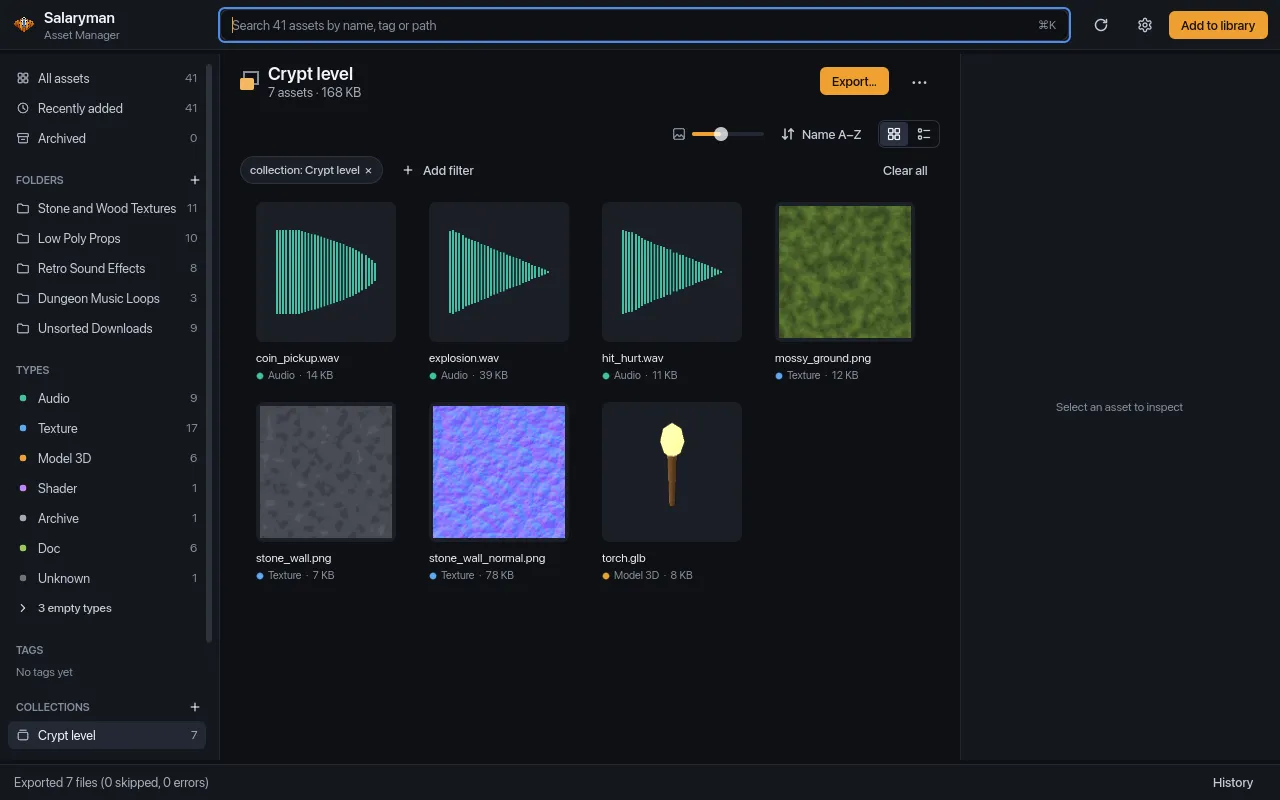
Section titled “4. Check the collection”Click Crypt level under Collections in the sidebar. The header shows “7 assets · 168 KB”: three textures, three sounds and the torch.
5. Open the export dialog
Section titled “5. Open the export dialog”Click Export… in the collection header. (Right-clicking the collection in the sidebar and choosing Export…, or Export current collection… in the command palette, does the same.)
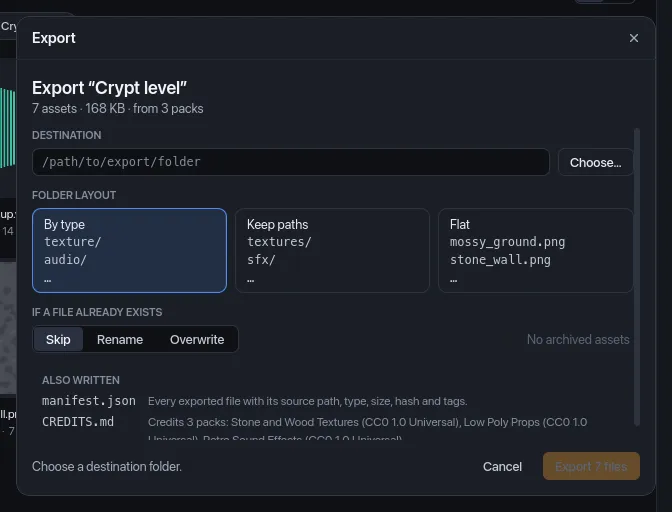
The dialog sums up what you’re exporting (“7 assets · 168 KB · from 3 packs”) and previews the result before anything is written. Until you pick a destination, the footer says “Choose a destination folder.” and the export button is disabled.
6. Choose the destination and options
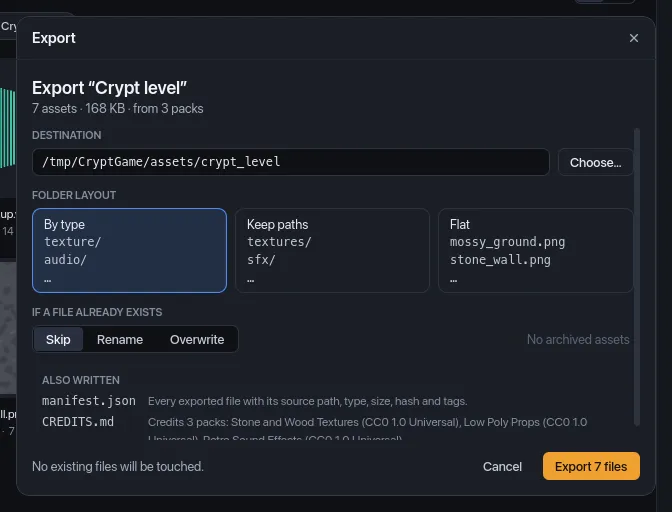
Section titled “6. Choose the destination and options”Click Choose… and pick the folder in your game project, then click Use folder. You can also type or paste a path into the field. The folder is created if it doesn’t exist.
Then check the options:
- Folder layout. Each card previews the top of the folder it creates.
By type sorts files into one folder per type (
texture/,audio/,model_3d/). Keep paths keeps each file’s path inside its library folder (textures/,sfx/,models/). Flat puts every file directly in the destination. - If a file already exists. Skip leaves the existing file alone,
Rename saves the new one with a
_1,_2… suffix, Overwrite replaces it. The footer counts the files that would clash, for example when two files share a name in a Flat export. - Include archived assets. Archived members of the collection are left out unless you tick this. It reads “No archived assets” when there are none.
- Also written lists
manifest.jsonandCREDITS.md, and which packs the credits will name.
7. Export
Section titled “7. Export”Click Export 7 files. The files are copied, the dialog closes, and the status bar reports the result: “Exported 7 files (0 skipped, 0 errors)”. A file that’s missing from disk counts as an error and is left out.
The app remembers the destination for this collection, and the layout and conflict choice for your next export, so re-exporting after you change the collection is two clicks. Exporting only copies files: your library and the originals are untouched, and there’s nothing to undo. To take an export back, delete the files from your project.
What the export wrote
Section titled “What the export wrote”With By type, the destination now looks like this:
crypt_level/├── CREDITS.md├── manifest.json├── audio/│ ├── coin_pickup.wav│ ├── explosion.wav│ └── hit_hurt.wav├── model_3d/│ └── torch.glb└── texture/ ├── mossy_ground.png ├── stone_wall.png └── stone_wall_normal.pngmanifest.json lists every file that was copied: where it came from inside
its library folder (source), where it went (target), its type, size,
SHA-256 hash and tags, plus the collection name, the export time (Unix
seconds) and the counts. It’s for your own tools, for example to check that a
file in your game is still the one you exported. Trimmed to one asset:
{ "assets": [ { "hash": "4def744015d7f16f6b6615bc5ecc6a760dc592eb8dc97bb1e63713660c3ac707", "name": "mossy_ground.png", "size_bytes": 12344, "source": "textures/mossy_ground.png", "tags": [], "target": "texture/mossy_ground.png", "type": "TEXTURE" } ], "collection": "Crypt level", "exported_at": 1794457383.48785, "stats": { "copied": 7, "errors": 0, "skipped": 0, "total": 7 }}CREDITS.md has one section per pack, with its author, source URL (when the
pack has one), the first line of its license and the assets you used from
it. After those come the license files found next to the exported assets,
then the assets you marked as your own work, then any assets with no license
under “No License Detected”. This is the file from this export, with the
license text shortened:
# Credits
## Stone and Wood Textures**Author:** Salaryman Inc.**License:** CC0 1.0 Universal
Assets:- mossy_ground.png- stone_wall.png- stone_wall_normal.png
## Low Poly Props**Author:** Salaryman Inc.**License:** CC0 1.0 Universal
Assets:- torch.glb
## Retro Sound Effects**Author:** Salaryman Inc.**License:** CC0 1.0 Universal
Assets:- coin_pickup.wav- explosion.wav- hit_hurt.wav
---
## LICENSE.txt
CC0 1.0 Universalhttps://creativecommons.org/publicdomain/zero/1.0/…
The License: line is the first line of the pack’s License field. If a pack’s license file starts with something else (a title, the pack’s name), put the license name on the first line of the pack’s license (Settings → Folders + packs, then Edit pack info… in the folder’s ··· menu) and export again.
Both files are rewritten on every export, whatever you chose under If a file already exists. The credits cover every asset in the collection, including ones skipped because they already existed; the manifest lists only the files copied this time.
Use CREDITS.md in your credits screen
Section titled “Use CREDITS.md in your credits screen”Licenses such as CC-BY require you to credit the author where players can
see it; CC0 doesn’t, but a credit is still appreciated. CREDITS.md has
what you need for each pack. You can copy its sections into your credits by
hand, or show the file in the game.
In Godot, if you exported into the project, the file is at a res:// path.
Godot leaves files it doesn’t import out of exported games, so add *.md
under Project → Export… → Resources → Filters to export non-resource
files/folders. Then a RichTextLabel can show it with light formatting:
extends RichTextLabel
const CREDITS := "res://assets/crypt_level/CREDITS.md"

func _ready() -> void:  bbcode_enabled = true  var lines := PackedStringArray()  for raw in FileAccess.get_file_as_string(CREDITS).split("\n"):    var line := raw.replace("[", "[lb]").replace("**", "")    if line.begins_with("# "):      lines.append("[font_size=28][b]%s[/b][/font_size]" % line.substr(2))    elif line.begins_with("## "):      lines.append("\n[b]%s[/b]" % line.substr(3))    elif line.begins_with("- "):      lines.append("    " + line.substr(2))    elif line != "---":      lines.append(line)  text = "\n".join(lines)
If you export several collections, each folder has its own CREDITS.md;
show them one after another, or merge their sections.
What you did
Section titled “What you did”- Built a collection from three packs, using the selection bar and the right-click menu.
- Exported it into a game project with a folder layout and a conflict policy you chose.
- Got a
manifest.jsonto track the files and aCREDITS.mdto credit every pack.
- Export describes every option of the export dialog and both files in detail.
- Fix assets with missing licenses clears the “No License Detected” section before you ship.
- Tags and collections covers renaming, duplicating and deleting collections.
- Packs and licenses explains where the pack names, authors and licenses in the credits come from.